


Migrating Data to AWS in a Data Lake Pattern
- September 29, 2021
Data migrations to the cloud are complicated and can be time consuming. Moving to the cloud and using a data lake share similar advantages in scalability, cost reduction, and business continuity. In particular, data lakes make advanced analytics easier by having a large pool of data for modeling. Given this, the best approach is to use managed services to reduce overhead and increase focus on what matters – getting your data to the cloud!
In an AWS data lake pattern, Amazon Simple Storage Service (Amazon S3) is the most popular target when moving data. This is because Amazon S3 is an extremely scalable, low cost, and easy to optimize object store that is metadata driven which is essential for data analytics. A data lake on AWS is a great migration strategy for storage of your data especially if moving towards a data lakehouse. (For more reading on this topic, see our blog, Why Your AWS Data Lake Transformation Needs a Lakehouse.) There are four primary stages to data migration. Read on as we delve into each.
Archival Data
Archival data is the easiest data to move. For this, a one-time move pattern, using the AWS Snow Family of products is helpful. The Snow Family can move a range of 5 TB to 100 PB.

Product to data size comparison is smallest to largest. Image courtesy of aws.amazon.com
In most cases, you will receive a portable device; after you load your data onto it, data will be in the cloud as quick as it takes to mail back! For sizes smaller than 5 TB you should consider this next option due to economies of scale.
File Type Data
Next, I recommend moving your incoming file type data. By the end of your data migration, you will want to change the entry point to your Amazon S3 bucket location to be fully in the cloud but don’t over-complicate your move by putting the cart before the horse! For this data you will want to use AWS DataSync.
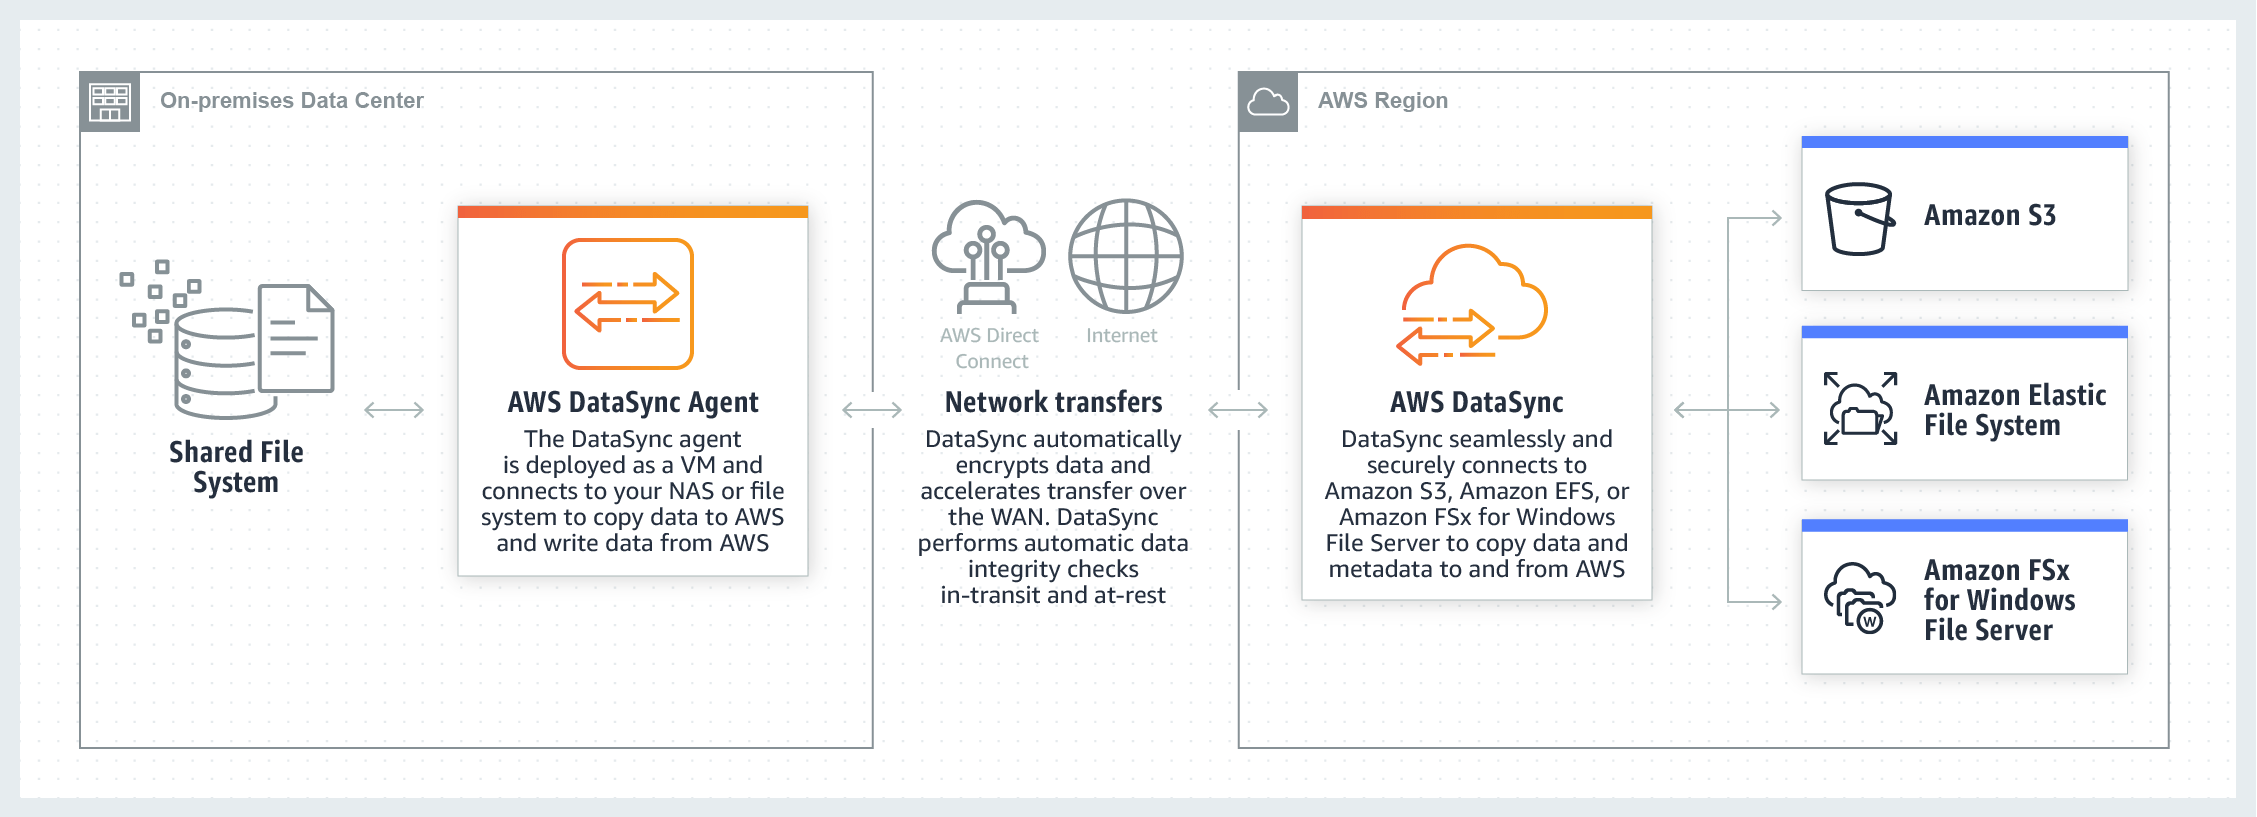
Image of AWS DataSync courtesy of aws.amazon.com
Amazon Elastic File System (Amazon EFS) and Amazon FSx are out of scope for this discussion. Although, Amazon EFS is the offering for NFS storage and Amazon FSx is the SMB storage offering. Amzon FSx also has an NFS offering but I would suggest using Amazon EFS over Amazon FSx for Lustre.
AWS DataSync handles traditional NAS-like file systems, such as NFS and SMB, and can automate moving your data through either a regular internet connection or by setting up a direct connection to your account with AWS DirectConnect. If you are in a multi-account pattern, the best way to implement this is to use a single account as an entry point from on-prem infrastructure to the cloud. This way the VM agent(s) which you install on-prem do not need to be scaled. Once you are in the cloud you can use the cloud native features of AWS DataSync to move the data to the correct account faster while limiting the necessary on-prem infrastructure.
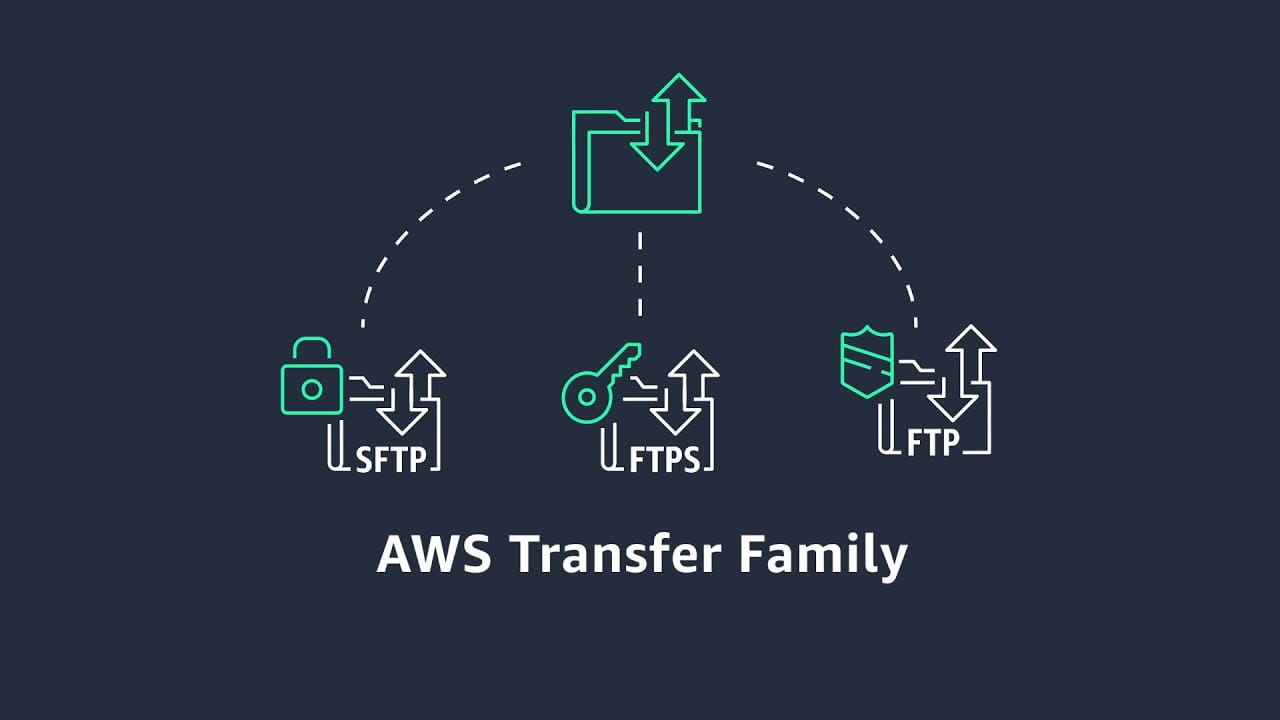
Image of the AWS Transfer Family courtest of Amazon Web Services YoutTube channel.
Disclaimer: when you start moving your dependent systems to the cloud, do not make AWS DataSync a critical component to your downstream applications. AWS DataSync is used for batch move operations and does not follow a push pull model. For this pattern, you will want to use the AWS Transfer Family of products. Moving to an SFTP or FTPS (or FTP if absolutely necessary) will work much better for those distinct push file transfers where the downstream is already expecting the file in the Amazon S3 bucket. Eventually, you should set a goal to move away from this type of file move for more efficient and effective movement of that data. A good pattern to align to, as an example, is streaming.
Streaming Data
Between queuing, non-real-time, and real-time streams/topics, moving a streaming workload can be complicated even if you can stay with your current environment’s approach in the cloud by setting Amazon S3 as one of your sinks. Make sure at a minimum you are batching your streams properly when using a data lake pattern to prevent system impact. As a rule of thumb, fewer larger objects rather than many smaller ones as a good approach. Before committing to keeping your method, look over these options. As said in the beginning, these managed services will reduce overhead and increase focus on what matters – which is what is in the stream, the data!
In the cloud there are two ways to handle types of streaming data:
- Migrate using Amazon Managed Streaming for Apache Kafka (Amazon MSK) to keep the Kafka familiarity or
- Use the Amazon Kinesis streaming product line along with Amazon Simple Queue Service (Amazon SQS). The largest benefits you will see with the Amazon Kinesis products is better integration with AWS-native services and that they are divided to be more purpose build.
Outside of these benefits, the two approaches are conceptually extremely similar when comparing the different products to what Kafka offers. Keep in mind there will be a learning curve of shards vs partitions or topics vs streams for example. For Amazon SQS, it is serverless and gives you the power of decoupling your message queue for use across your systems and applications. If you are looking to go cloud-native, Amazon Kinesis and Amazon SQS are great products.
If you are looking to move your queuing workload off the Kafka platform, Amazon SQS is a fantastic replacement because it allows you to easily interact with other native services or leverage the AWS SDK in your favorite language to take advantage of this message queuing service.
For non-real time migration, Amazon Kinesis Data Firehose is the best product choice. To ensure proper batching, use the batch interval setting to control how much time Amazon Kinesis Data Firehose should collect from streams before depositing into the lake.
For real-time, you should not use your data lake as the entry point as trying to manage delivery from the data lake would be too slow for accurate real-time analysis. Send your real-time stream directly to the analysis target (Amazon EMR or Amazon Redshift for example). Now after arriving at its destination, move the data into Amazon S3 directly from where the analysis is being done to prevent the potential need to batch and to prevent potential throttling. Moving with the destination analysis target is recommended but you can also write by setting Amazon S3 as a sink in your stream. If you add Amazon S3 as a sink, make sure you are batching properly as previously stated.
If you are looking at Amazon Kinesis, Amazon Kinesis Data Streams (Amazon KDS) is the product you are looking for. It is still recommended to move the data into Amazon S3 as a part of arrival for analysis, but you can use the Amazon Kinesis Producer Library (Amazon KPL) to batch your streams for finer control before using Amazon Kinesis Data Firehose to write to your data lake. When following this method, you will want to use aggregation as the type of batching. Otherwise, you can use the standard batching interval setting with Amazon Kinesis Data Firehose.
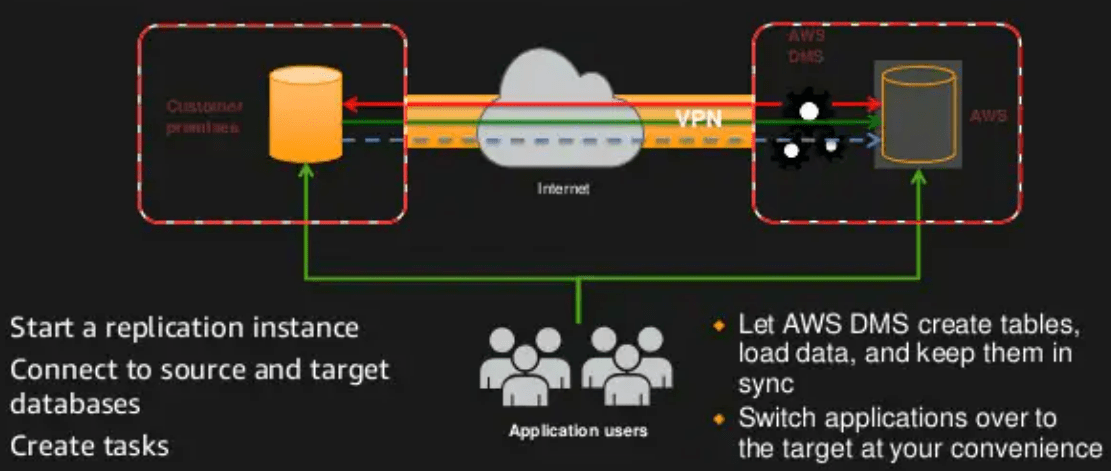
Image of AWS DMS courtesy of FSlideshare.net
Databases
Now to the elephant in the room, databases and/or data warehouses. First, determine how much data is critically necessary to keep in your data store. Once you establish your critical size, you can consider consolidation or offloading to different types of data stores (caching, NoSQL, etc.) to optimize your workload. This will also help in the long run by determining the life cycle of your hot data. By establishing a period of criticality, you can shift your data to where it is best utilized and most optimized.
Next, by using the AWS Schema Conversion Tool (AWS SCT) offered by the AWS Database Migration Service (AWS DMS), for migration of your production workload schema and objects to your choice of Amazon Relational Database Service (Amazon RDS), Amazon Redshift or Amazon Aurora. Non-critical data on the data store will go directly to Amazon S3, just like everything prior. Here are a few call outs when using Amazon S3 as the target for AWS DMS. CDC default behavior for the truncate command is to remove all files and folders from the Amazon S3 bucket. By using task settings, you can disable the way AWS DMS handles this DDL behavior. Note that when using BatchApply, Full LOB mode is not supported and using it might result in loss of data.
Looking for additional ways to save time and grow your cloud efficiency? Subscribe below to the Tech Blog where we share best practices and other cloud insights weekly.
Subscribe to our blog